Map Labels in ArcGIS Pro – 5 Tips and Tricks
I have a bit of a love-hate relationship with labeling. What I love is that it adds clarity to my maps. But what I hate is that it can be really tedious to put them where you want them to go. Hopefully, this article can clear up some of the confusion.
Labeling basics in ArcGIS Pro
In general, there are two types of labeling in GIS:
Today, we’re going to focus on automatic labeling in ArcGIS Pro.
Converting labels to graphics vs annotation
Before we begin, a lot of GIS software claims to have “smart labeling”. My opinion is that it’s all a myth. It will never place labels exactly where you want them to go 100% of the time.
So, when all else fails, just convert your labels to graphics or annotations. Because converting labels gives you the flexibility to place them anywhere you want.
For professional quality maps, there will always be times that you’ll have to convert labels to graphics. Unless a map needs dynamic labeling, you’ll have to try automatic labeling.
Below, I’ll cover the automatic label placement options in ArcGIS Pro.
Label placement and conflict resolution
When labeling in ArcGIS Pro, it’s easy to feel like you’re trapped on a hamster wheel. You’re spinning your wheels. But you’re going nowhere.
As a key map element, labels need to be placed with purpose. But busy maps with too much labeling are confusing.
Here are some of my top tips and tricks. Plus, we’ll troubleshoot some of the most common labeling problems.
1. You can’t see your labels
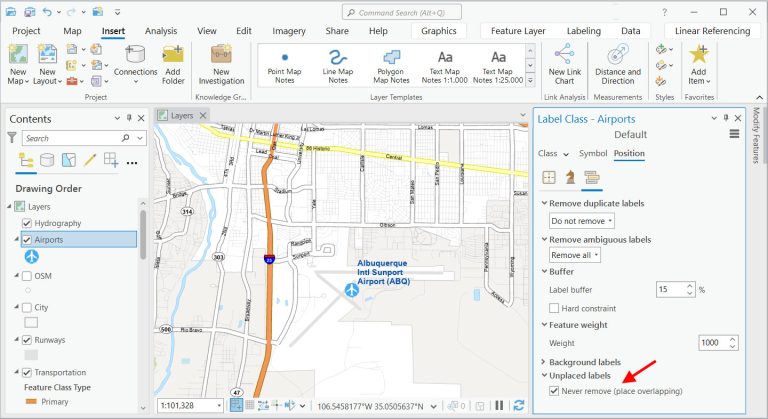
What do you do if you can’t see your label? It still happens to me all the time. To troubleshoot this problem, you have to ensure ArcGIS Pro never removes labels. Right-click your layer in the table of contents, then click Labeling Properties.
This will open the labeling panel on the right side. Click on the “Position” tab. Next, click on the “Conflict resolution” button. Under the “Unplaced labels” drop-down, click “Never remove (place overlapping)”.
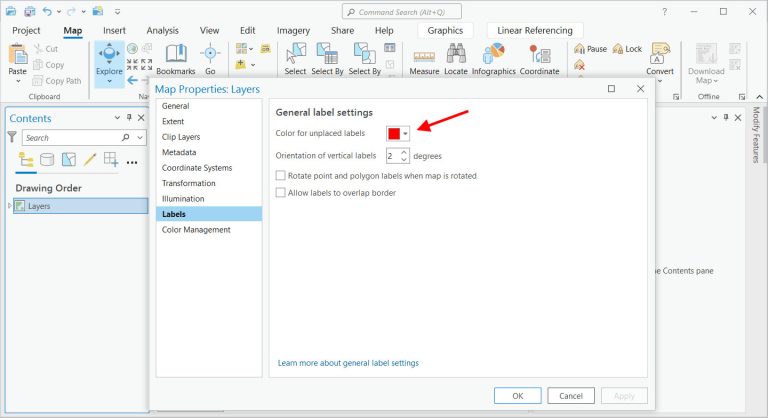
2. Unplaced labels are red
By default, ArcGIS Pro will draw unplaced labels in red. If your map has unwanted red labels, it’s possible to change these labels to another color.
In your table of contents map, right-click the data frame and select “Properties”. Next, in the “General Label Settings”, change the “Color of unplaced labels” to another color like black.
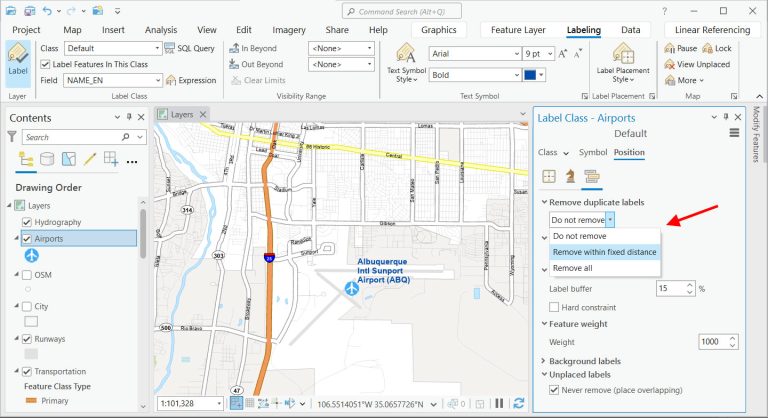
3. Duplicate labels
Dealing with duplicate labels in ArcGIS Pro is a common issue. This is especially true when working with datasets that have repeating values. Right-click your layer in the table of contents, then click Labeling Properties. In the “Position” tab, select one of the following options:
- Do Not Remove – This will keep any duplicate labels.
- Remove Within a Fixed Distance – This will remove any duplicate labels within a fixed distance.
- Remove All – This will remove any duplicate labels in this layer.
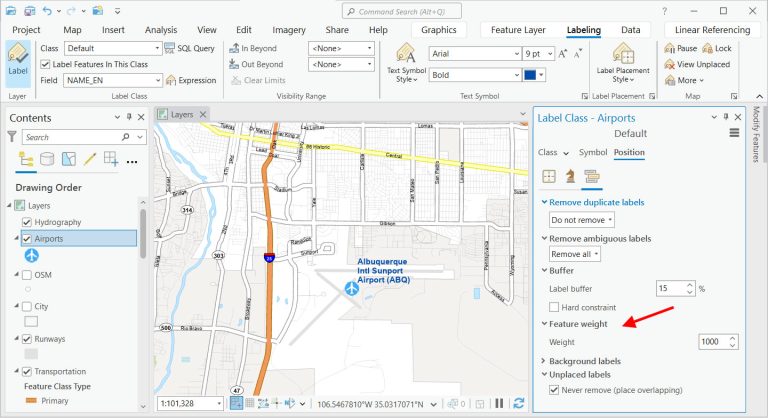
4. Setting feature weights
Setting feature weights can help map readability. Higher-weighted features are more likely to be avoided by labels. In other words, this means labels are less likely to be placed over these features.
For any important features in your maps, you should set feature weights to the highest. This will help any labels being placed on top of these features.
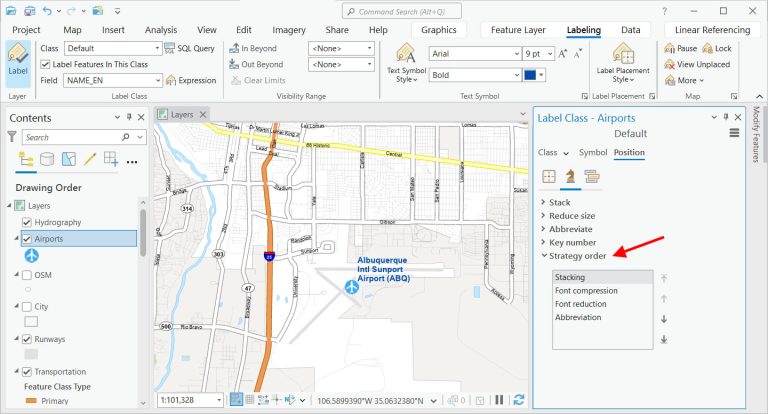
5. Overlapping labels and fitting strategies
Before we get into overlapping labels, this is a point that you should consider converting labels to graphics. This can be very tedious to pick different strategies. It’s not impossible. But it can also be a complete waste of time.
ArcGIS Pro has “fitting strategies” to deal with overlapping labels in your maps. You can choose which ones you want to use. Plus, you can order them based on their importance.
- Stacking: Divide labels into multiple lines based on spaces, commas, or other separators.
- Font Compression: Condenses text by reducing space between characters.
- Font Reduction: Decrease label font size.
- Abbreviation: Uses shortened forms of words to save space.
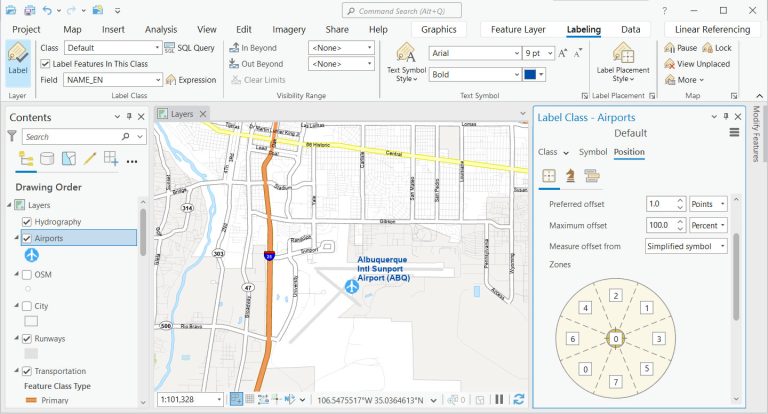
Label placement position
ArcGIS Pro gives you control over where and how you display labels. Here are some of the label placement options that are available:
- Anchor Points: Anchor points adjust label positions relative to features. Options include above, below, or directly on top.
- Offsets: Offsets control label distance from features. This enhances clarity by reducing clutter around point symbols.
- Alignments: Alignment options (left, right, center) are relative to anchor points. Each affects label readability and layout.
- Curvature: Line labels can follow curves. You can also place labels perpendicular or repeat along the line.
- Leader Lines: For labels that cannot be placed directly next to their features, leader lines can connect the label to the feature.
Labels for your maps
Well-labeled maps are easier to read and understand. Without labels, you’d be lost. The positioning of labels ensures that maps are readable and aesthetically pleasing.
By carefully balancing label placement, cartographers can create maps that communicate effectively. This includes anchor points, offsets, alignment, priority settings, and more.
Do you have any questions about labeling in ArcGIS Pro? We’d love to hear from you in the comments section below.