Digitizing Tips: 15 Must-Know Editing Tools in ArcGIS Pro

Digitizing Tools in ArcGIS Pro
This article will walk you through our 15 favorite editing and digitizing tools in ArcGIS Pro.
I’ll be showcasing their functionality and demonstrating how you can leverage them to digitize your GIS data.
These tools allow you to shape, transform, and refine your data to accurately represent the features you are working with.
Alright, let’s get started!
1. Split Features
Splitting features allows you to interactively divide a single feature into multiple parts. You may have a single polygon representing a large area, and you want to cut it into smaller polygons based on specific boundaries or attributes.
For example, imagine splitting a state polygon into individual county polygons. That would be when you’d want to use the “split feature” editing tool.
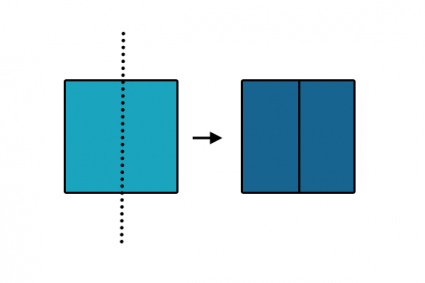
2. Merge Features
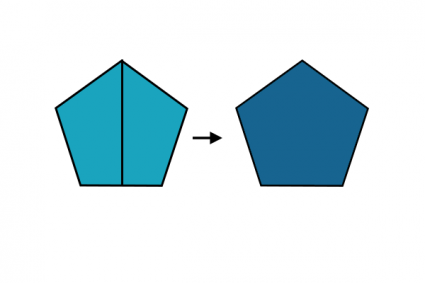
The merge tool is the opposite of the split tool. It allows you to combine multiple adjacent polygons into a single fused polygon. But it doesn’t only include the features, you also have to select the attributes that you want to retain.
Using this editing tool is common when you’re working with cadastral and administrative boundaries. It’s similar to the Merge Tool and can be valuable when you want to clean your data for cartographic purposes.
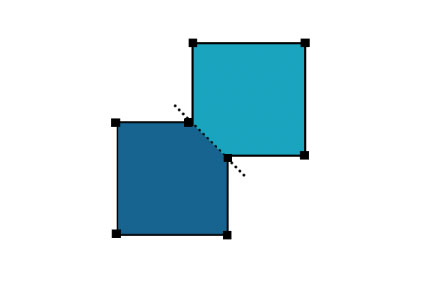
3. Trace

Tracing is the process of following the vertices of a boundary to create new ones. It involves using an existing feature, such as a line or polygon, as a reference to create a new feature that aligns with or is connected to the original.
Tracing is useful when you have complex or detailed features that are difficult to make accurately from scratch. By tracing existing features, you can ensure that the new features align correctly with the underlying geographic features.
4. Extend Features
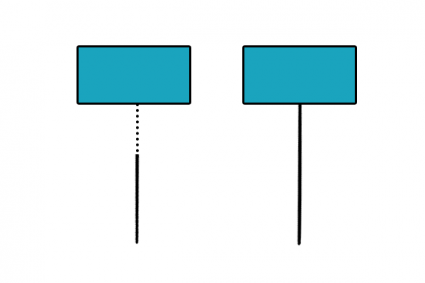
“Extending features” means that you’re lengthening a line feature by expanding a new segment connected to its endpoint. For example, let’s say you have a road that is not connected to an intersection.
You can use the “extend features” editing tool to increase its length and snap it to another road feature. It’s a great way to ensure that you don’t have any undershoots in your line feature dataset.
5. Autocomplete Polygon
Autocompleting polygons helps you speed up the process of digitizing polygons by filling in missing segments or closing gaps in adjacent boundaries. When editing polygon features, the autocomplete polygon tool incorporates the existing geometry in a dataset.
Next, it attempts to close the polygon based on the surrounding features. This can be extremely useful to prevent overlaps and create a topologically correct dataset.
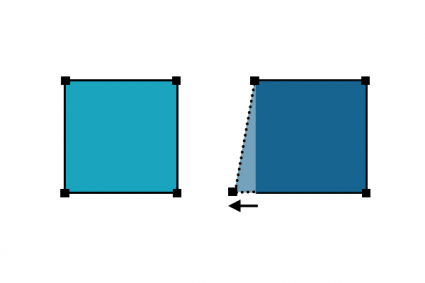
6. Reshape Features
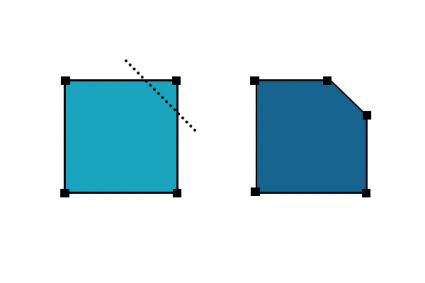
Reshaping features is a common task in editing when you adjust the shape of existing features to reflect changes on the ground. It means that you’re modifying the geometry or shape of existing geographic features by making changes to the boundaries.
First, you select the shape that you want to modify. Afterward, you can reshape it according to any way you digitize and add vertices on a map.
7. Divide
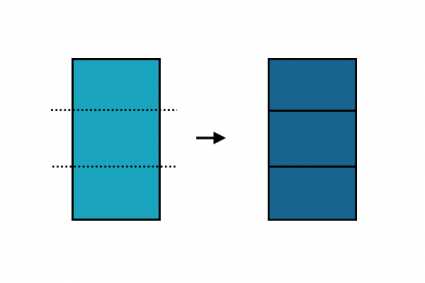
Dividing features while editing will break down a polygon into separate features with user-specified values. This tool allows you to divide features in different ways.
First, you can divide features by equal area. Secondly, you can split features by equal width. Finally, you can use proportional area. Typically, you use this tool by drawing a line to set the direction you want to divide a polygon.
So the main purpose of this editing tool is to partition geographic data into smaller components common with cadastral or administrative data.
8. Align Features

Aligning features can help you ensure features are accurately positioned relative to each other. It helps you manipulate the features to achieve better alignment, either by snapping them to desired positions or using a traced line with a buffer tolerance.
Aligning features is important to ensure the accuracy and consistency of spatial data. It is often necessary when integrating data from multiple sources, correcting misalignments, or conforming features to specific standards.
9. Editing Vertices
Editing vertices allows you to modify the coordinates of the individual points that define the shape of a geographic feature.
First, adding new vertices to a line or polygon refines its accuracy and adds more detail. Secondly, deleting vertices simplifies the shape by reducing the number of points defining it.
Finally, moving vertices can help you relocate individual vertices to adjust the position of points that make up a line or polygon.
10. Replace Geometry

Replacing geometry will substitute the entire geometry of a feature with a new one that you have specified. So let’s say you completely want to replace the shape of a feature, this editing tool is the best way for you to do that.
But what’s important to note is that it will maintain the attributes of the geometry that you are replacing it with. So before you use this editing tool, pay very close attention to the attributes of the target geometry because this is what will be kept when you’re finished using this tool.
11. Generalize
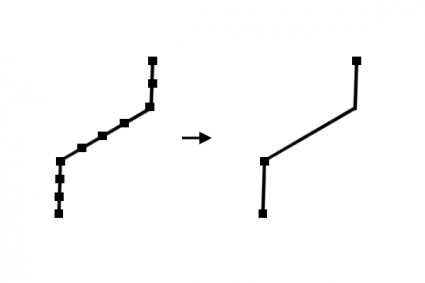
Generalization helps simplify complex features while maintaining their shape and characteristics. You can densify features that add vertices to a shape at a specified interval or offset distance.
First, you can simplify features that remove unnecessary details but still preserve the essential shape of a feature. Secondly, you can smooth features that convert straight edges into curves.
12. Rotate

The “rotate” operation refers to the action of changing the orientation or angle of a geographic feature. It involves spinning the feature around a specified point or pivot. Based on this pivot point, you can alter its angle while maintaining its shape and geometry.
It’s possible to either specify the rotation angle numerically by pressing the letter “A” on your keyboard. Alternatively, you can interactively spin features using the wheel that ArcGIS Pro provides for you.
13. Trim
Trimming features is an editing tool that’s exclusive for line geometry. The main purpose of this tool is to shorten a line feature by removing excess portions of it.
This tool is essential for removing any dangles that might have been caused by digitizing features. You can use the trim tool to interactively edit and refine line features and it’s the opposite of using the extend tool for editing.
14. Freehand

The freehand editing tool allows you to interactively draw or sketch new lines or polygon features directly on the map using a hand-drawn approach. It provides flexibility to create or modify features without constantly clicking your mouse.
Users can create or edit features by simply dragging the cursor or stylus across the map, following the desired path or boundary.
As the user moves the cursor, the tool captures the position and creates a line or polygon feature that closely matches the drawn path. This allows for more fluid digitization with the use of curves.
15. Buffer
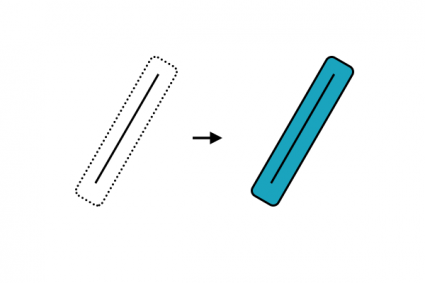
Similar to the buffer geoprocessing tool, there is an editing tool that allows you to create a buffer around features with a set distance. When using this tool, you can set the buffer distance and the number of rings you want it to create.
You can also choose whether you want the buffer on the right or left side, or both. Finally, you can select how the endpoint is buffered with either a rounded or square end.
Conclusion
This article highlighted 15 valuable digitizing tips and tricks to improve your GIS editing workflows.
From basic operations like editing vertices to more advanced tasks like aligning features, these tips offer insights to make editing more effective and enjoyable.
Remember, practice is key to mastering these techniques. Take the time to experiment with the tips here and adapt them to your specific projects.