How To Create Map Templates in ArcGIS Pro
In this article, we’ll provide you with step-by-step instructions on how to get started creating map templates.
So if you’re looking to create consistent map layouts within your organization, you’ll learn how to do this by using layout files in ArcGIS Pro.
Creating Layout Files
The purpose of layout files (.pagx extension) in ArcGIS Pro is to create templates for any map in an organization.
The main advantage of layout files is that once you import one, it will contain a layout and a map, which are linked to each other.
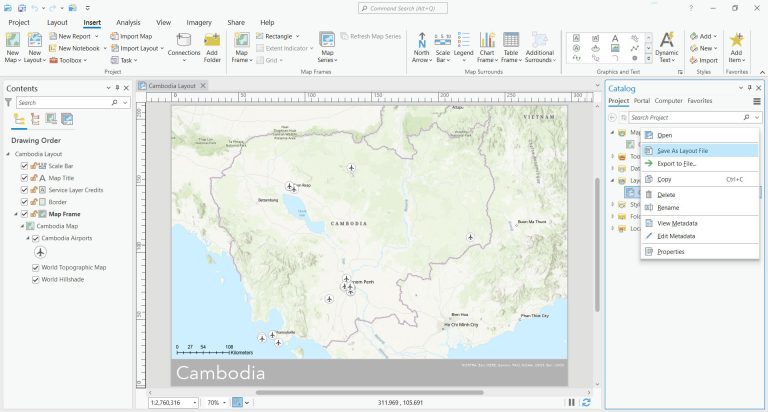
If you want to create a layout file, right-click on the layout in the Catalog pane. From there, you can select “Save As Layout File”.
Importing Layout Files
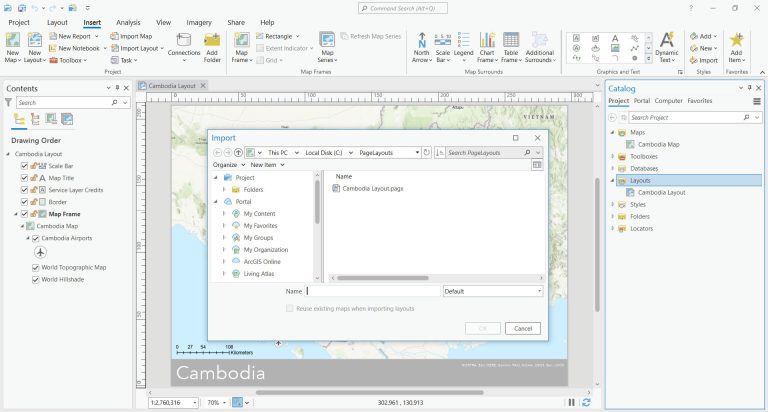
In the first step, you’ve saved a “layout file”. You can import a layout file by navigating to the “Project” tab in the Catalog.
From there, you can right-click the “Layouts” folder and click “Import”. Now, all you have to do is find the page layout (.pagx format) that you saved in the previous step.
The most important thing to realize is that a layout file doesn’t only create a new layout, but it also imports a new map.
Importing Layout Files Are Similar to MXDs
For those who are familiar with ArcMap, layout files are similar to importing an MXD.
When you wanted to create a copy of a layout in ArcMap, you could simply copy and paste an MXD in Windows Explorer.
Maps and layouts were always connected to an MXD in ArcMap. But in ArcGIS Pro, a project (.aprx) can have multiple layouts and maps.
You can’t do this by going into ArcCatalog and copying and pasting a layout. Instead, it’s best to use a layout file because you can reuse any existing maps and templates.
READ MORE: 20 ArcGIS Pro Tips and Tricks