Legends Tutorial in ArcGIS Pro
Working with Legends in ArcGIS Pro
When moving from ArcMap to ArcGIS Pro, one of the biggest adjustments you’ll have to make is building a map legend.
To be honest, it can be frustrating designing a legend exactly how you want it to be. But I can give you some tips that can help you customize your legends exactly the way you need them.
How to Add a Legend
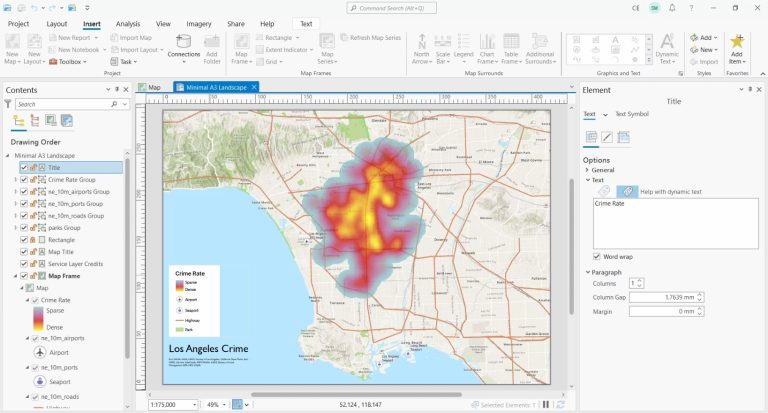
In my example map, I have airport points, seaport points, road lines, park polygons, and a crime rate heat map (raster).
If I want to add a legend to my map, I can click on the “Insert” tab and select the “Legend” button (Insert > Legend).
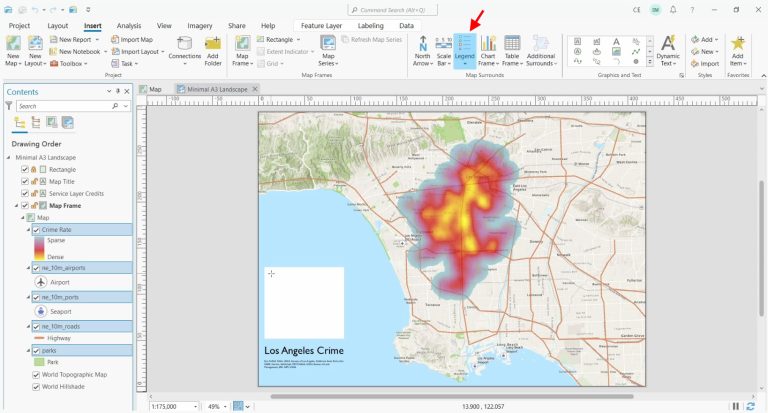
Before you add a legend, remember that you have to select all the layers that you want to appear in your legend (see below). So in my example, I am going to select all the layers in my table of contents before I click Insert > Legend.
Adding Items to a Legend
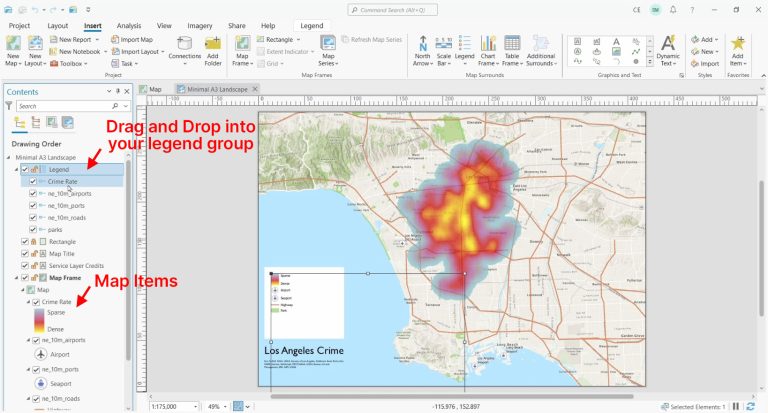
If you didn’t select any layers before adding your legend (in the last step), there’s no need to panic. That’s because it’s still possible to add or remove items at any time.
To add an item to your legend, you have to drag and drop your map items by holding your mouse to a legend group (see screenshot below).
If you want to remove any items from your legend, you can simply uncheck any items in the legend grouping.
This is extremely different from ArcMap. Frankly, it takes some time to get used to it. And it can be difficult to do if you have a lot of elements in your table of contents. See our other ArcGIS Pro tips and tricks for more helpful guides.
Customizing Your Legend
So far, you’ve learned how to add and remove items in your legend. But how do you customize your legend?
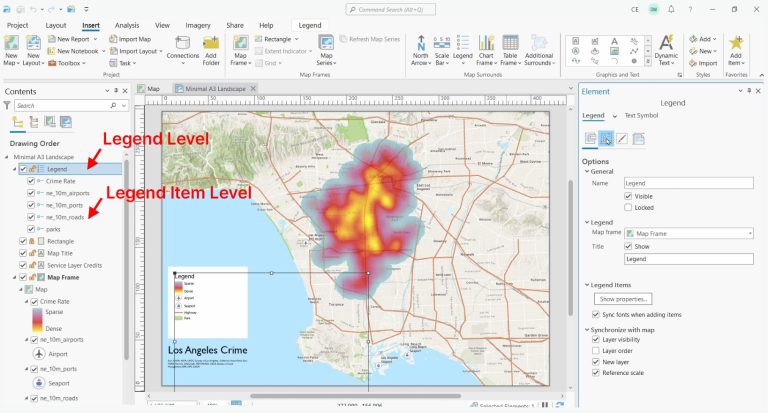
The first step is to right-click your legend and select “Properties”. A panel will pop up on the right. But what you have to remember is that there are 2 levels to customize.
Just remember to pay special attention to which level you are changing because they have their own differences.
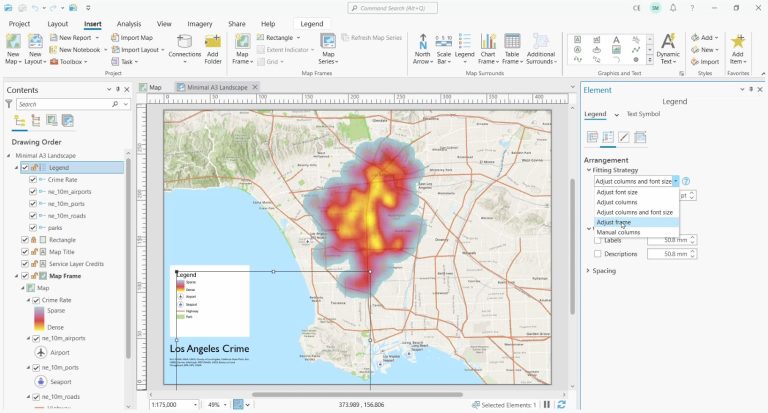
Legend Arrangement Fitting Strategy
One of the most important options that you want to pay the most attention to is the “Legend arrangement fitting strategy”. The purpose of this option is how it will fit your legend on the canvas.
The legend arrangement fitting strategy options are as follows:
The more you play around with it, the more you realize that there’s not a single good option for arranging your legend. But I generally select the “Adjust frame” option because it doesn’t resize my font size.
You’ll also need to adjust your “spacing”. Just click on the top-level legend group and they’re kind of hiding in Legends > Arrangement > Spacing. If you change the spacing for the “Items”, it will give some padding and gaps between each legend item.
Converting Your Legends to Graphics
Sometimes things just don’t work out as they should. If you can’t grapple with your legend the way you want to, then you can simply convert it to a graphic.
I only suggest that you do this as a last resort.
To convert your legend to a graphic, simply right-click your legend and select “Convert to graphics”.
When you do this, you have the ultimate flexibility to edit your legend in any way. I also suggest ungrouping all your elements. You can do this by right-clicking again and choosing “Ungroup”.
But the downside about converting your legend to a graphic is that it won’t update automatically if you add anything to your legend.


What I needed. Thanks!