Supervised and Unsupervised Classification in Remote Sensing
Unsupervised vs Supervised Classification in Remote Sensing
The 3 most common remote sensing classification methods are:
- Unsupervised classification
- Supervised classification
- Object-based image analysis
What are the main differences between supervised and unsupervised classification? You can follow along as we classify in ArcGIS.
| Aspect | Supervised Classification | Unsupervised Classification |
|---|---|---|
| Definition | Classification guided by known training samples | Classification without predefined training data |
| Training Data | Requires labeled training data for each class | No labeled training data required |
| Process | Involves training the classifier using labeled samples | Uses clustering algorithms to group pixels |
| User Involvement | Requires user to select training samples | Minimal user intervention during classification |
| Class Information | Prior knowledge of class identities is needed | Classes are discovered from data patterns |
| Accuracy Assessment | Often results in higher accuracy due to training | May have lower accuracy due to lack of training |
| Applicability | Effective for identifying specific classes | Suitable for exploratory data analysis |
| Flexibility | Less flexible, as predefined classes are used | More flexible, as classes are generated dynamically |
| Complexity | Potentially more complex due to training process | Generally simpler as it relies on clustering |
Supervised Classification in Remote Sensing
In supervised classification, you select training samples and classify your image based on your chosen samples. Your training samples are key because they will determine which class each pixel inherits in your overall image.
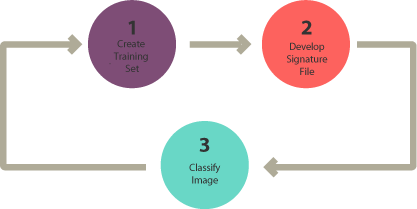
When you run a supervised classification, you perform the following 3 steps:
- Select training areas
- Generate signature file
- Classify
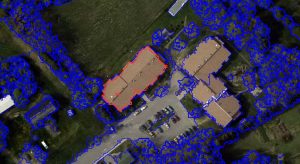
Step 1. Select training areas
In this step, you find training samples for each land cover class you want to create. For example, draw a polygon for an urban area such as a road or parking lot. Then, continue drawing urban areas representative of the entire image. Make sure it’s not just a single area.
Once you have enough samples for urban areas, you can start adding training samples for another land cover class. For example, you can add polygons over treed areas for the “forest” class.
If you’re using ArcGIS, the steps are:
- Beforehand, you must enable the Image Analysis Toolbar (Windows ‣ Image Analysis).
- Add the training sample manager. Then, click the “Draw Polygon” icon to add training samples.
- For each land cover class, draw polygons. Then, merge them into a single class.
Step 2. Generate signature file
At this point, you should have training samples for each class. The signature file is what holds all the training sample data that you’ve collected up to this point. It’s a way to save your samples for you to work on at a later time.
The steps in ArcGIS are:
- Create a signature file by clicking the “create a signature file” icon.
Step 3. Classify
The most common supervised classification methods include:
- Maximum likelihood
- Iso cluster
- Class probability
- Principal components
- Support vector machine (SVM)
As shown in previous studies, SVM achieves one of the highest levels of accuracy for prediction. But each option has its own advantages. Overall, it’s best to test each one for yourself.
In this step, the input is your signature file which has the training samples. If you run it and don’t like the result, then you may have to verify your training samples. Ultimately, this is the best way to know where your classification errors exist.
The steps in ArcGIS are:
- Run the “classify” tool. Next, your input will be the signature file.
Unsupervised Classification in Remote Sensing
[Unsupervised classification generates clusters based on similar spectral characteristics inherent in the image. Then, you classify each cluster without providing training samples of your own.
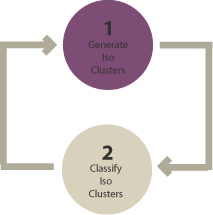
The steps for running an unsupervised classification are:
- Generate clusters
- Assign classes
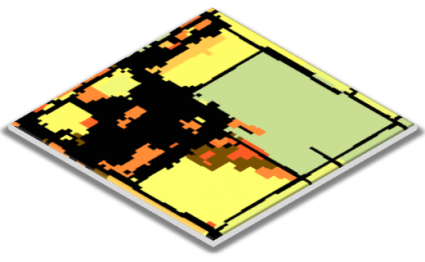
Step 1. Generate clusters
In this step, the software clusters pixels into a set number of classes. So, the first step is to assign the number of classes you want to generate. Also, you have to identify which bands you want to use.
If you’re using Landsat, here is a list of Landsat bands. For Sentinel, here are Sentinel-2 bands. We also have a handy guide on spectral signatures which explains which spectral bands are useful for classifying different classes.
In ArcGIS, the steps for generating clusters are:
- First, you have to activate the spatial analyst extension (Customize ‣ Extensions ‣ Spatial Analyst).
- In this unsupervised classification example, we use Iso-clusters (Spatial Analysis Tools ‣ Multivariate ‣ Iso clusters).
INPUT: The image you want to classify.
NUMBER OF CLASSES: The number of classes you want to generate during the unsupervised classification. For example, if you are working with multispectral imagery (red, green, blue, and NIR bands), then the number here will be 40 (4 classes x 10).
MINIMUM CLASS SIZE: This is the number of pixels to make a unique class.
When you click OK, it creates clusters based on your input parameters. But you still need to identify which land cover classes each cluster belongs to.
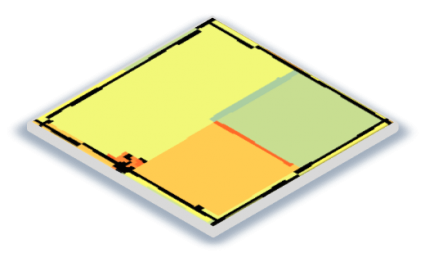
Step 2. Assign classes
Now that you have clusters, the last step is to identify each class from the iso-clusters output. Here are some tips to make this step easier:
- In general, it helps to select colors for each class. For example, set water as blue for each class.
- After setting each one of your classes, we can merge the classes by using the reclassify tool.
If land cover appears in 2 classes, you will need to make some manual edits. For example, if vegetation was mistakenly classified as water (perhaps algae in the water), you will have to manually edit the polygon.
In most cases, it helps to convert the raster to vector and use the editing toolbar. You can split polygons to help properly identify them.
READ MORE: 9 Free Global Land Cover / Land Use Data Sets
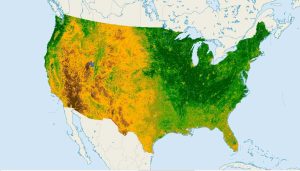
Land Cover Classification with Supervised and Unsupervised Methods
Today, you’ve learned how to create a land cover using supervised and unsupervised classification.
But the next step forward is to use object-based image analysis. This is the most modern technique in image classification.
Don’t stop here. Read some more of our comprehensive articles on remote sensing:

I’m doing my undergraduate degree and need some help understanding change detection in remote sensing
I am doing my PhD and want to use GIS and remote sensing tools. In this case, I need sot of guidelines with clear steps. I am happy and highly appreciate it if you support me.