How To Create a Web Map in ArcGIS Online (AGOL)
How To Create a Web Map in ArcGIS Online (AGOL)
This is an introductory tutorial on how to create web maps and scenes in Esri ArcGIS Online (AGOL).
ArcGIS Online is Esri’s cloud-based platform for collaborating, sharing, and connecting with geographic data.
In this ArcGIS Online tutorial, we guide you from start to finish to create and share web maps online.
As AGOL is easy to pick up and learn, we suggest you experiment for yourself with this feature-rich platform.
READ MORE: An Introduction to Esri ArcGIS Online (AGOL)
Step 1. Log into your ArcGIS Online account
If you want to create an interactive web map with ArcGIS Online, you will need to create a free account. Once your account has been approved, you can start interacting with the tools to build web maps, scenes, and apps in ArcGIS Online.
After a bit of waiting, you’ll have to log in to your ArcGIS Online.
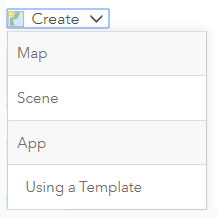
Step 2. Create a Web Map
The next step is to start creating a web map, web scene, or app. But what’s the difference between them?
WEB MAP: A web map is a simple 2D viewer for geographic data. This 2D data could be vectors such as points, lines, or polygons. And it can even include tables or rasters.
WEB SCENES: A web scene is a type of 3D viewer. Generally, the two types of scenes are local and global. For local scenes, the study area is small like a neighborhood. But for global scenes, the study area is much larger like a continent or ocean.
WEB APP: Finally, a web app is a way to customize your web maps or web scenes. For example, you may want to build a story map, collect/edit data or add basic functionality like these web maps and scene examples using Esri’s JavaScript API
Let’s start by creating a simple web map. But you can apply the same steps below to web scenes.
Step 3. Add Title and Tags
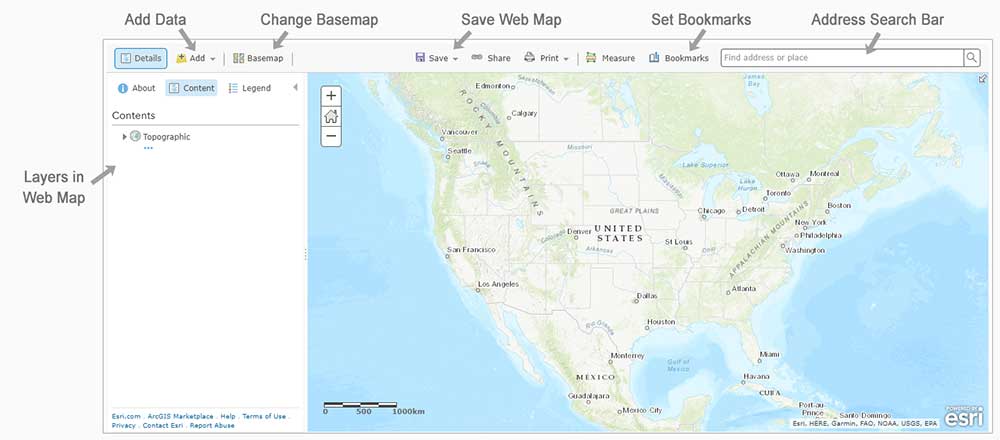
The simplest option is to create a basic web map. If you select this option, you will have to provide a title and tags.
Once you’ve provided this, suddenly an empty web map appears in your browser. This is the interface for how to create your web map. In the screenshot below, we list some of the important tools to get started.
Step 4. Change the Basemap
The default base map is the “Topographic Basemap”. But you can change the base map by selecting the dropdown. For example, there are base maps for “World Imagery”, “Terrain”, “Streets” and “Oceans”.
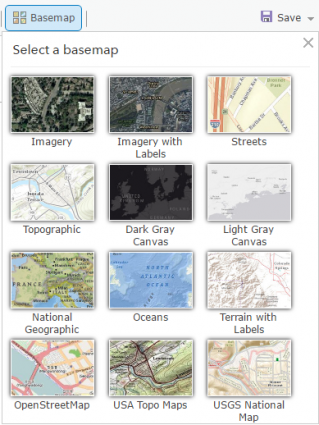
In this example, we select the “Dark Gray Canvas” base map.
Step 5. Add Data to your Web Map
Instead of a plain web map with only a base map, we should add data to it. And one of the reasons why ArcGIS Online is so good is because users can access and add an incredible amount of data to their web maps.
When you click the “Add Button”, there are select several options to add data.
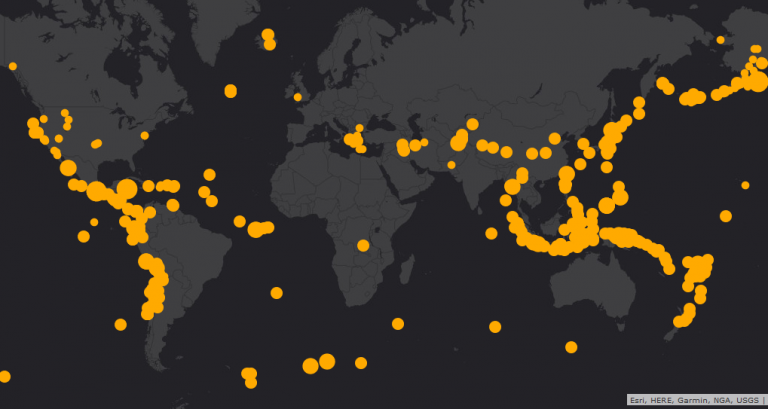
SEARCH FOR LAYERS: When you search for layers, this is the massive cloud database as part of ArcGIS Online. You can find anything here which includes authoritative and non-authoritative (so be careful). As of now, there are more than 500,000 layers.
ADD LAYER FROM WEB: This option is how to reference web services online. This usually is in the form of REST services, that you have to point to.
ADD LAYER FROM FILE: If you have your own data on your personal computer, then you can add data as a zipped shapefile, CSV, TXT, GPX, or GeoJSON.
USE MAP NOTES: This is how to mark up the web map with basic shapes. For example, AGOL has map note templates for infrastructure, civic events, and citizen requests.
In our map, we have added earthquake events using the “Search for Layers”. Earthquake events are highlighted as orange points.