ArcGIS Drone2Map: Streamline your Drone Imagery Collection
ArcGIS Drone2Map
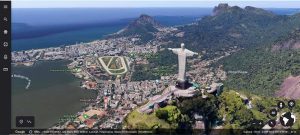
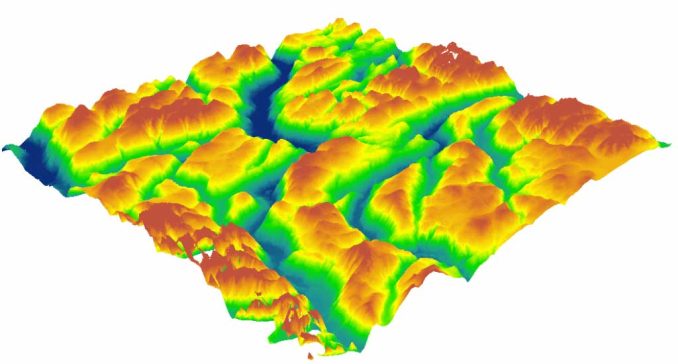
Drone imagery can be a powerful tool for capturing high-quality orthoimagery and terrain models. But once you collect data from a drone, what’s the best way to process it?
Drone2Map brings your drone imagery into the ArcGIS platform and streamlines the creation of map-ready products with an automated workflow.
By allowing you to build post-flight imagery products all in one go, it’s an intuitive way to seamlessly integrate drone imagery into the ArcGIS platform.
This article introduces you to the world of ArcGIS Drone2Map as a drone mapping software. It also gives you an overview of the drone data collection workflow and some of its capabilities.
Using Drone2Map for ArcGIS
Drone2Map is an intuitive and easy-to-use tool that works seamlessly within the ArcGIS platform. But in order to start mapping with this software, you have to know a bit about the process of data collection with drones.
From collecting ground control points to streamlining your imagery workflow, this video provides a brief overview of all the steps involved in ArcGIS Drone2Map software.
Drone Collection and Workflow
Unfortunately, ArcGIS Drone2Map does not have the functionality for building flight paths. So in order to fly your drone, you will have to check with the manufacturer of the drone such as the DJI Go App.
But other than mission planning, ArcGIS Drone2Map has a robust set of steps as part of the drone imagery collection process. Here is an overview of both field and office processes to help you get started.
Looking for UAV imagery? Try out our list of free drone imagery, which can be downloaded in geospatial format.
Step 1. Capture Ground Control Points
First, you will need to capture ground control points with a GPS system (such as Collector). A ground control point is a reference point that you can use to tie images to the ground so they are located and oriented properly.
Step 2. Imagery Review
Before you finish a drone survey, you will want to make sure that you have completely captured everything you wanted. It’s best to do this in the field before you return to the office. Otherwise, you’d have to make an extra trip to the field to complete an extra drone survey.
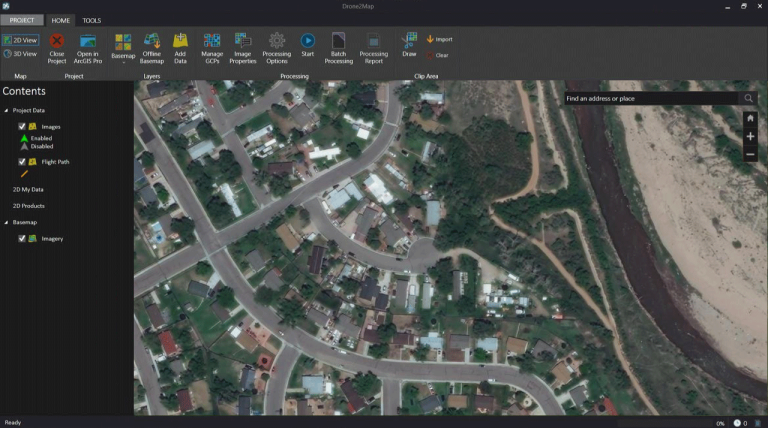
Step 3. Execute Imagery Workflow
ArcGIS Drone2Map streamlines drone imagery creation by using its EXIF data. Because it’s able to integrate your ground control points, this automated workflow can convert raw unprocessed drone images into map-ready products to use for GIS or CAD.
But you don’t necessarily need ArcGIS Pro to use this product as it can be published directly through ArcGIS Online, which is a cloud-based service.
Applications and Use Cases
One of the main benefits of ArcGIS Drone2Map is that it can produce a wide range of products for a variety of different purposes. Here are some of the types of products that this tool can create depending on the type of drone:
Each type of product can serve a wide variety of applications. For instance, here are some of the common use cases from drone imagery.
Summary: ArcGIS Drone2Map
Although the integration of drones in GIS is still in its infancy, it has so much to offer.
ArcGIS Drone2Map allows you to streamline your data collection with drones. It provides a robust set of tools and automated workflows.
So not only do you get a range of mapping products to work with, but you can also take it a step further with additional analysis tools in ArcGIS Enterprise.
Do you own a drone and have you ever used ArcGIS Drone2Map before? Did you find it easy to use? What did you like or dislike about it? We’d love to hear from you in the comment section below.
Drone Imagery Platforms
Here are some alternatives for drone data collection:
- Birdi – Upload drone missions in a central geospatial platform.
- Drone Deploy – Fly commercial drones and store in a centralized location.