How to Create NDVI Maps in ArcGIS
NDVI measures “greenness” and healthy vegetation. In this guide, we teach you how to calculate NDVI in the ArcGIS Image Analysis Toolbar Simply, follow these 4 steps.
We use Normalized Difference Vegetation Index or NDVI maps to assess vegetation health. For example, agriculture, forestry, and ecology all use it.
In general, NDVI uses two properties to quantify healthy vegetation. It uses near-infrared (NIR) because vegetation strongly reflects it. And it also uses red light, because plants strongly absorb it. For this same reason, this is why our eyes see vegetation as the color green.
Now that you have a bit of background on NDVI, let’s go through all the steps on what you need to create NDVI maps in ArcGIS.
How to create NDVI maps in ArcMap
You can create NDVI maps with the image analysis toolbar in ArcGIS Pro. All you need is imagery with red and NIR bands. For example, you can download Sentinel-2 or Landsat data from this list of 15 free satellite imagery sources.
In this tutorial, we want to classify high and low vegetation. Pixels with high NDVI values indicate high vegetation or chlorophyll. Whereas, low NDVI values generally mean less vegetation. Furthermore, negative NDVI values are a good indicator that it’s classified as water.
In this NDVI example, we use Worldview-2 (WV-2) which is multispectral imagery. We say multispectral because it has multiple bands like red, green, blue, and near-infrared (NIR). The band configuration for WV-2 is:
| Band Number | Band Description |
|---|---|
| Band 1 | Coastal |
| Band 2 | Blue |
| Band 3 | Green |
| Band 4 | Yellow |
| Band 5 | Red |
| Band 6 | Red Edge |
| Band 7 | Near Infrared 1 (NIR-1) |
| Band 8 | Near Infrared 2 (NIR-2) |
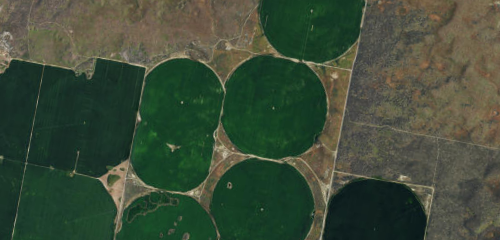
Let’s examine this agricultural area with center pivot irrigation. As this type of irrigation rotates on a pivot in a circle, it creates these circular crop patterns.
If you want to display true color, select the red, green, and blue bands in layer properties. We say true color because it is the same as how our eyes see. In the case of Worldview-2, this would be band 5 as red, band 3 as green, and band 2 as blue.
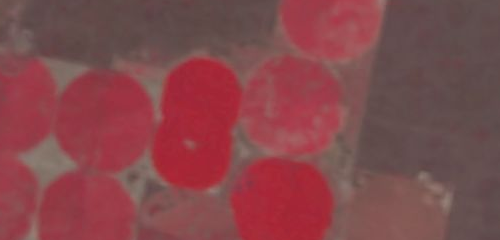
But if you want to display color infrared, you need band 7 as the red channel, band 5 as the green channel, and band 3 as the blue channel. We say color infrared because near-infrared is in the red channel. As you can see below, the pivot irrigation vegetation should already be shouting out at you in bright red!
Now, let’s go through the steps for how to create an NDVI map.
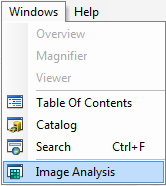
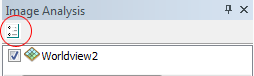
Step 1. Enable Image Analysis Toolbar
First, enable the Image Analysis Toolbar (Windows > Image Analysis). The image analysis window will be displayed in ArcMap.
Step 2. Check Scientific Output Properties
Second, under “Image Analysis” options, select the red band and the near-infrared band.
For Worldview-2 imagery, under the NDVI tab – the red band is “band 5” and the NIR band is “band 7”.
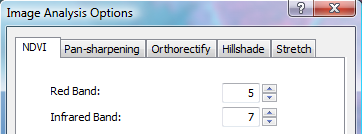
Optionally select “Scientific Output” so your values range from -1 to 1.
Step 3. Click the NDVI Icon
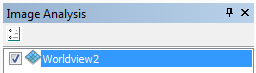
Highlight your layer by clicking it.
Under properties, Select the NDVI icon which looks like a leaf.
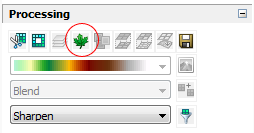
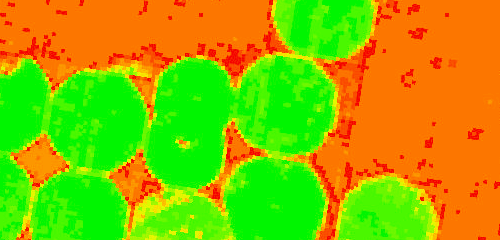
This will create a temporary layer in the table of contents. Bright green indicates high NDVI. Whereas red has low NDVI.
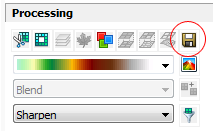
Step 4. Export Raster
Highlight the new NDVI layer that you want to export by selecting it in the image analysis toolbar.
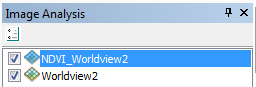
Right-click layer, and export the raster to save into memory.
High positive NDVI values (green) mean high vegetation. While water usually has negative NDVI values (yellow and red). In general, urban features usually are near zero.
How to use NDVI maps
Normalized Difference Vegetation Index (NDVI) uses the NIR and red channels to measure healthy vegetation. If you want to calculate it manually, this is the formula you can use.
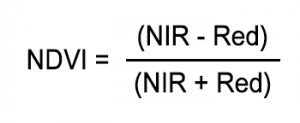
NDVI always generates a value between -1 and +1. It’s really just a standardized way to measure healthy vegetation. But how do you apply NDVI as a remote sensing application?
In the example above, agriculture uses NDVI for precision farming. If you look very closely at the NDVI image, you can see where crop growth isn’t as good. In this case, farmers can increase crop yield by knowing exactly where unhealthy vegetation is. Here are other GIS applications on the farm.
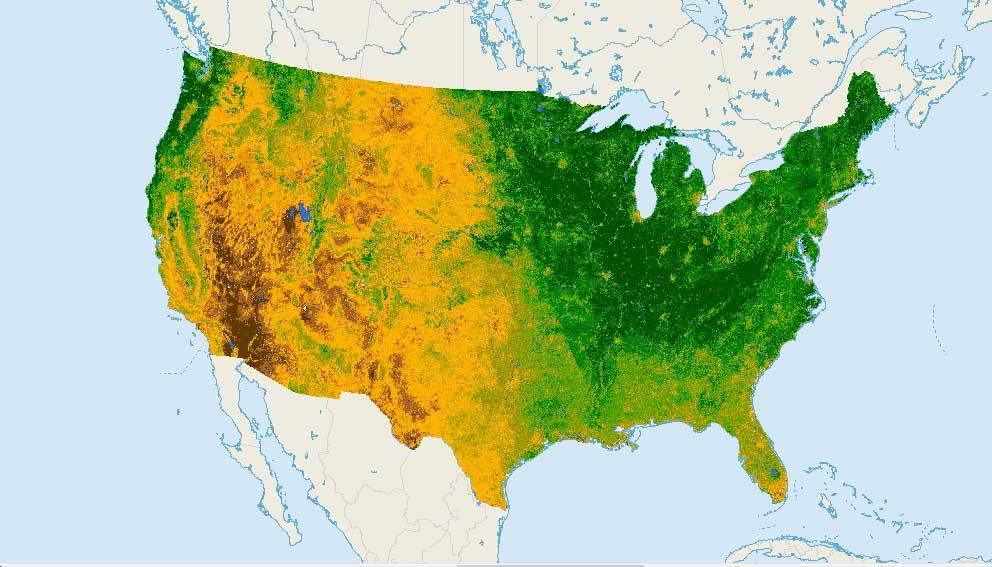
For over 20 years, AVHRR has recorded NDVI. Because we know how NDVI changes over time, this helps us understand vegetation growth on Earth. In forestry, this helps them understand leaf area index, forest supply, and fire danger
READ MORE: 100 Remote Sensing Applications & Uses


I have Sentinel 2 data and further, I have to do crop identification to find out whether the crop is sugarcane or mustard /potato, etc., also crop health monitoring from NDVI. So, for that, I have to do layer stacking and classification or direct NDVI in ArcGIS will work. Could you please illustrate the steps and how to start with the work?
This is really very nice and helps for analysis. However, usually, strict NDVI values aren’t declared. It is true that NDVI values range from -1 to 1 but in strict form the intervals aren’t given. So, that creates the problem to reclassify the NDVI values and impossible to estimate the area coverage and the like of the vegetation cover. Could you please help us with the clear values (ranges) of the computed NDVI to estimate to generate more results?
Please guide me how to do this with R and Python. After coding and getting results, how could we open final raster in ArcGIS?
Could you please suggest any tutorials?
Regards
I am currently working on crop aerial images to classify them as health or unhealthy.
Can somebody guide me how to do this with NDVI?
In step 3, the green leaf icon is disabled. Please guide.
1. You have to select the two bands that you want to run the NDVI on.
2. Image analyst extension isn’t turned on.
Try those two. Let me know if you have any luck
What can I do if I am getting a result for my NDVI and have a feeling that the result is not correct? For example, the vegetation in the past recorded low when LULC change analysis justify high percentage as regards to vegetation.
Is there any way for you to go in the field and ground truth your results? That is the only way to be certain.
I just love the explanation….Easy step processes and definition being highlighted which really solve all my NDVI analysis project. Cheers!
Very useful, whereas I am more concerned about the specific location and distribution mapping of some plants only, out of complete vegetation of about 300 sq.km.
How to do this?????
You’ll need finer spatial and spectral resolution data such as LiDAR, hyper/multispectral
Once I save and export the NDVI layer, the values are not scientific anymore and range from 200 to -31. How do I keep the layer from 1 to -1 after I export it to my map?
can you tell me the band designations for landsat-7
Here’s a link for all Landsat band designations: https://gisgeography.com/landsat-program-satellite-imagery-bands/
Hi. Can someone tell me a way to convert NDVI values into chlorophyll? OR how to get chlorophyll content (mg/m2) in rice canopy? OR how to develop chlorophyll maps?
@Killi I have the same problem, you may have already solved it?
How to calculate the AREA of the NDVI Ranges???
How do you follow the same process with modis data in ArcGIS 10.2, I intend to make natural color image so can I use the combination of band 1,2,1 as RGB???
To create NDVI in ArcGIS 10.0, you can also use arctoolbox-raster calculate
Version 10.1 up to 10.x uses NDVI the same as this.
How is this performed with Landsat 8 imagery, exactly? The images are separated into the bands. If I open 5 and 7, and run the options are described here, the NDVI button remains grayed out.
Here are the band designations for Landsat-8:
Band 1: Coastal / Aerosol – 0.433 – 0.453 µm (30 m)
Band 2: Visible Blue – 0.450 – 0.515 µm (30 m)
Band 3: Visible Green – 0.525 – 0.600 µm (30 m)
Band 4: Visible Red – 0.630 – 0.680 µm (30 m)
Band 5: Near Infrared – 0.845 – 0.885 µm (30 m)
Band 6: Short Wavelength Infrared – 1.56 – 1.66 (30 m)
Band 7: Short Wavelength Infrared – 2.10 – 2.30 (30 m)
Band 8: Panchromatic – 0.50 – 0.68 (15 m)
Band 9: Cirrus – 1.36 – 1.39 µm (30 m)
Band 10: Long Wavelength Infrared – 10.3 – 11.3 µm (100 m)
Band 11: Long Wavelength Infrared – 11.5 – 12.5 µm (100 m)
So you will need bands 4 and 5. If you have these bands as separate images, then you should use the “composite band” tools. This will combine bands into a single image. After running this tool, you should be able to follow these steps and create an NDVI map.
We’re using 10.3. Sorry but not sure how to do it in 10.0
Thank you for your advice but I’m using ArcGIS version 10.0 and the option is not there. What version are you using?
In the image analysis toolbar, click the top-left for the options. In the NDVI tab, “scientific output” is the bottom option. Click the check mark.
Where is the “Scientific Output” tool or tick box located in Step 2?I can’t find it.Please help.
This is really very nice and helps for analysis. However, usually strict NDVI values aren’t declared. It is true that NDVI values range from -1 to 1 but in strict form the intervals aren’t given. So, that creates the problem to reclassify the NDVI values and impossible to estimate the area coverage and the like of the vegetation cover. Could you please help us the clear values (ranges) of the computed NDVI to estimate to generate more results.