PyQGIS: How To Build a Python Script in QGIS
PyQGIS: How To Build a Python Script in QGIS
PyQGIS refers to the Python environment within QGIS. It allows users to automate workflow and extend QGIS with the use of Python libraries.
But it’s not only Python core libraries. You can also leverage thousands of third-party libraries adding functionality with scientific and data analysis.
PyQGIS allows users to implement Pythonic constructs so people who are used to using Python will catch on quickly.
Let’s take a look at PyQGIS and how you can build Python scripts of your own in QGIS.
Python Console in QGIS
Python can be used with QGIS to manipulate GIS data and perform advanced analysis. One way to access PyQGIS is through the Python Console:
Plugins > Python Console
The first option is to write Python code line-by-line in the console. But the Python Console also has a script editor (IDE), which makes it easier to save and run scripts.

For example, you can write your own tools and mix various libraries that are installed with QGIS in Python scripts that you write.
Processing History
Every time you run a tool in QGIS, it also stores the history. But these pre-ran tools that you run also create a Python dictionary.
One of the best ways to familiarize yourself with PyQGIS is by checking the code from your algorithm history. Additionally, you can use this as a starting point for your own custom script. You can access the processing history by clicking the “clock” icon in the Processing Toolbox.
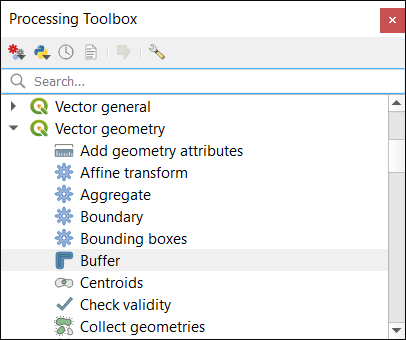
When you use code from a script, you can replace certain parts of it as necessary. For instance, if you run the buffer tool, you can check the exact PyQGIS code in the processing history.
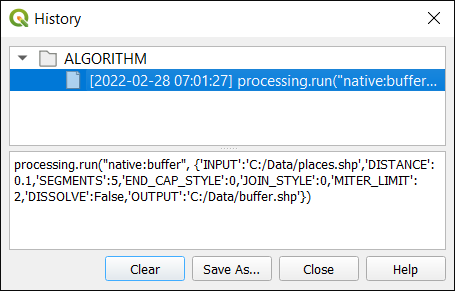
In this case, the PyQGIS code for running the buffer tool is as follows:
processing.run("native:buffer", {'INPUT':'C:/Data/places.shp','DISTANCE':0.1,'SEGMENTS':5,'END_CAP_STYLE':0,'JOIN_STYLE':0,'MITER_LIMIT':2,'DISSOLVE':False,'OUTPUT':'C:/Data/buffer.shp'})If you want to incorporate this into a Python script, all you have to do is update the parameters in the script. For example, you can change the distance, dissolve type, or output parameter.
In our case, we are going to use the exact same code from the buffer processing history and copy and paste it into the QGIS Python Console. Because we already have a file name called “C:/Data/buffer.shp”, we are going to change the OUTPUT to “C:/Data/buffer2.shp”.
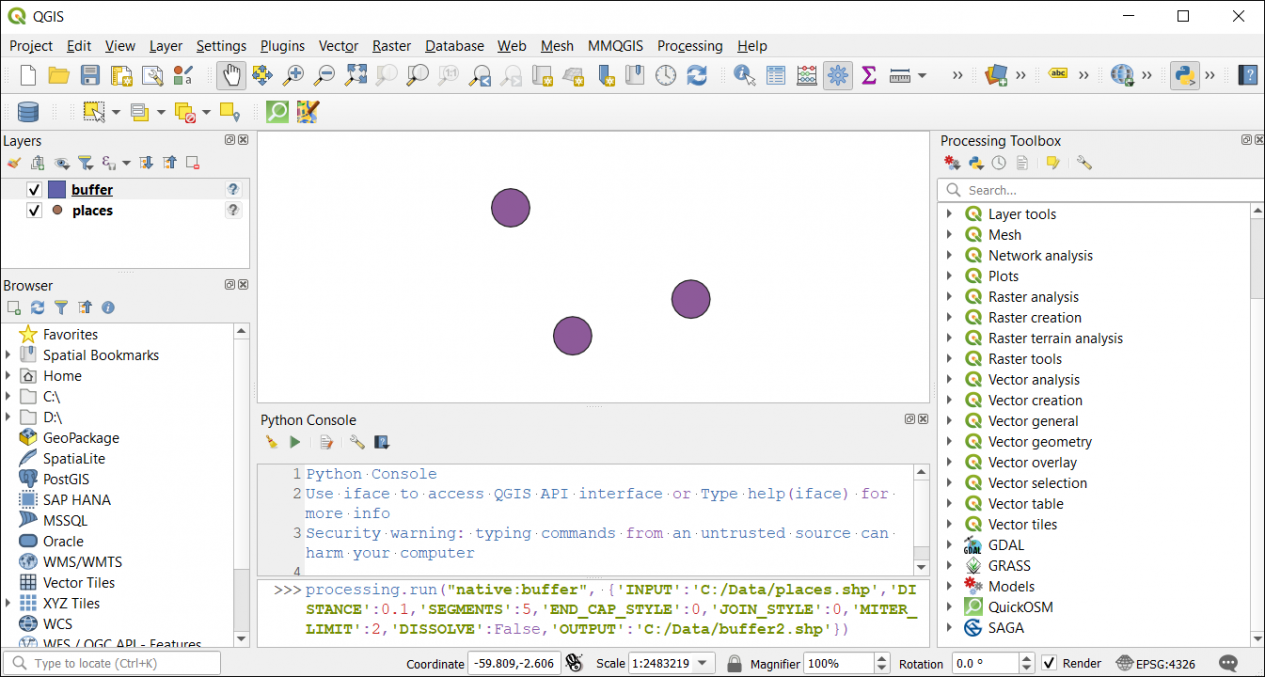
So it’s really this simple getting started with PyQGIS. To recap, you simply just check your processing history, then use this code as a handy shortcut for the creation of a script.
Graphical Modeler
The Graphical Modeler is a visual way to string different processing algorithms together. If you’re familiar with ArcGIS ModelBuilder, it’s similar but for QGIS.
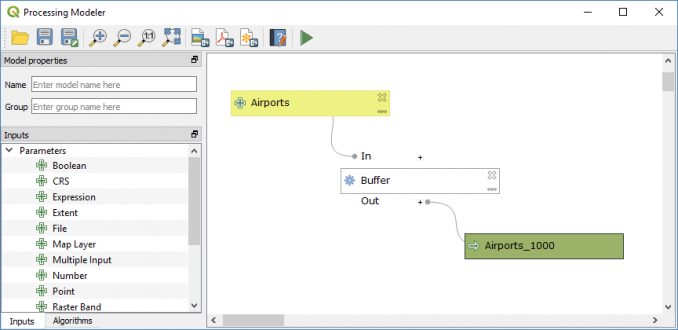
All you have to do is drop inputs, outputs, and algorithms to the interface. Then, you connect them together sequentially in the order you want to run.
This is how you build a repeatable workflow in QGIS. But you can also export the Graphical Model as a Python script. Again, this makes an excellent starting point for a script. Then, it’s a matter of updating the PyQGIS script to better suit your needs.
Custom Python Algorithm
If you go to the Processing Toolbox, you can find the Python icon. This is how you can build your own scripts, which will open the IDE.
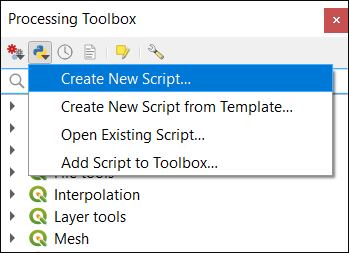
Alternatively, you can create a new script from a template. This pre-written code can help you save time writing your own processing tools.
It’s easy to add an interface with the writing template. You can even make a plugin this way.
PyQGIS Documentation
The PyQGIS documentation is a great way to learn how to use Python. If you want to leverage any QGIS algorithm, then you can check the documentation for any tool.
It also provides clear examples of how to use individual features, code snippets, and best practices for using PyQGIS.
For example, you’ll have to check any tool parameter if you want to use the intersect tool, merge datasets, or dissolve tool. Here are the two PyQGIS sources of information that are worth your time to check out for building and customizing scripts.
The QGIS Documentation is the main user guide for QGIS based on the current release. Next, the QGIS Python API is an index related to the core, GUI, and analysis content of the QGIS Python API documentation.
PyQGIS – Python in QGIS
Python is one of the most widely used programming languages today. It’s a versatile language that is capable of handling almost any type of programming task.
It has the flexibility to be used in various fields, including web development, scientific computing, and data science.
Python also has an extensive set of libraries that provide support for many different tasks, which means you can use it to build both large and small applications.
Are you using PyQGIS? How do you like it and what are some examples of how you use it? Please let us know with a comment below.