How to Make a Map in QGIS
How to make a map with just 13 mouse clicks
Everyone’s always looking for the “easy button”. If you want to know how to make a map using GIS for free, I have your “easy button”.
But first, you may be wondering… “Why should I use GIS in the first place?”. “Can’t I just find a free map maker online?”
Possibly. But what I am going to show you today… The software is completely free to use. And the data is in the public domain so you can use it for any purpose.
Wanna know the best part? You can customize your map in a ridiculous number of ways. For example, you can add new sources of data, build various types of maps, and even publish it on the web.
You’re just 13 mouse clicks away from building a map fueled by GIS. So let’s get started.
READ MORE: Learn the Basics: A List of QGIS Tutorials
1. Download and Install QGIS
Click 1: Go to the QGIS Download Page
In this example, we use QGIS (short for Quantum GIS) to build our map. QGIS is the MVP of open source GIS software because it’s easy to use, free to download, and has limitless capabilities.
Just a heads up, we’re counting mouse clicks. When we said it takes 13 clicks, we really meant it. Your first click is to follow this link to the portal where you can download QGIS.
Click 2: Download QGIS
No matter your operating system, QGIS is available for Windows, Mac OS X, and Linux. Before installing it, you have to download the QGIS Standalone Installer.
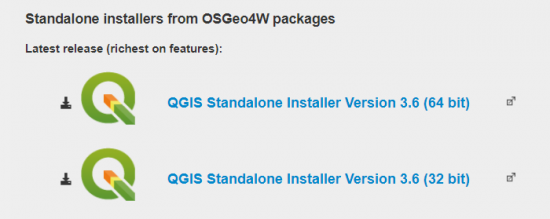
If you have a 64-bit operating system, your second click is to download the QGIS Standalone Installer Version 3.X (64-bit). If not, then proceed with downloading the 32-bit version.
Click 3: Install QGIS
Upon completion, the installer will display it in your browser. Next, click the installer to begin the setup on your machine.
If the installer doesn’t show in your browser, you will have to locate it in your file explorer. For example, it will resemble the following file name QGIS-OSGeo4W-3.X-Setup-x86_64.exe.
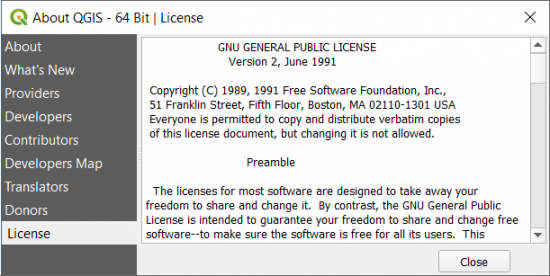
Click 4: Accept Agreement
If you want to use QGIS, you have to accept the license agreement. QGIS is licensed under GPL which grants you 4 freedoms.
- First, you can run the program as you wish, for any purpose.
- Secondly, you can access the source code and modify it to suit your needs.
- Next, you can redistribute it.
- And finally, you can distribute your modified version to others so they can benefit from it.
Click 5: Close Installer
So far, it’s been as easy as pie. Now that QGIS 3 is fully installed on your machine, the last mouse click is to close the installer. At this point, there’s no need to start QGIS. If you’ve been counting your mouse clicks, we should be at 5. Give or take a couple :)
The next big step is to download data for QGIS. Geospatial data is what powers your maps with geography. Also important is that each feature has associated attributes. For example, each city is a point. One attribute is its “name” such as “New York”. QGIS uses these attributes as labels on the map.
2. Jump Into the QGIS Quick Start Kit
Click 6 & 7: Download the Natural Earth Quick Start Kit
The Natural Earth (NE) Quick Start Kit is your “easy button”. As you’re about to see, all you have to do is download and launch it. For your first click, go to the Natural Earth downloads page. Then in your next mouse click, download the Natural Earth Quick Start Kit.
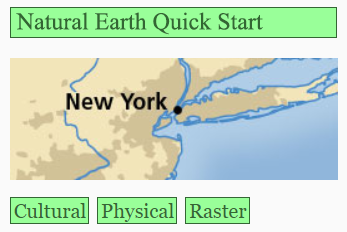
The quick-start kit contains all the necessary datasets you need to get started. The Natural Earth project is propelled by the North American Cartographic Information Society (NACIS). So not only do you get open, accurate, and complete spatial data… but you get symbology, labeling, and artistic talents from cartographers at NACIS.
Click 8, 9 & 10: Extract Quick-Start Kit
After it finishes downloading, it’s compressed as a zip file. Right-click Natural_Earth_quick_start.zip and left-click to extract it all.
This will decompress the zip file and put the data in a usable form. For the next step, you will need to find the QGS project file which resembles the image below.
Click 11, 12 & 13: Open the QGS Project File
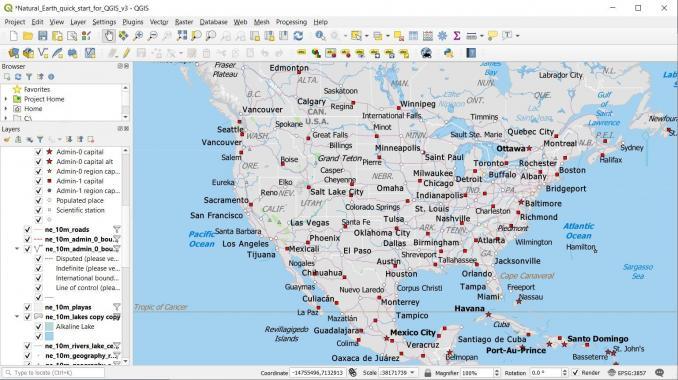
At this point, we have QGIS installed and data from Natural Earth. Fortunately, the Natural Earth Quick-Start kit comes equipped with a project file. The project file puts all your data in the table of contents so you can view it on a map canvas.
The QGS project file is buried in a couple of folders so be on the hunt for it. Once you find Natural_Earth_quick_start_for_QGIS_v3.qgs, double-click to open it. This will trigger QGIS to start up with all layers loaded in the map canvas.
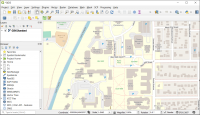
Finally, we made it to 13 clicks. If you followed each step correctly, your map and table of contents should look more or less like those below. It’s a map. But it’s still missing some of the final touches.
3. The Final Touches
Build a print layout
So far, you’ve built a map using QGIS and Natural Earth data with just 13 mouse clicks. If you want to create a map product from this view, you can export it as an image or PDF (Project > Import/Export > Export Map to PDF). But unfortunately, you’re missing the most common map elements like a legend, scale bar, and north arrow.
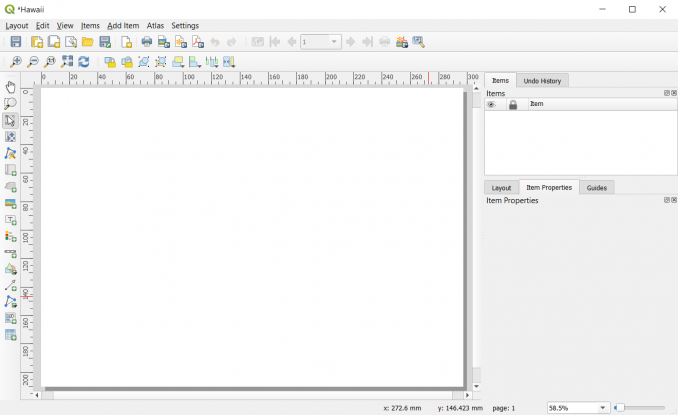
If you want to add these common map elements, you will have to create a “print layout” (Project > New Print Layout). Beforehand, zoom to your area of interest. Then, give your layout a name such as “Hawaii”. Print layouts almost act like separate applications because they display in entirely different windows.
Add a new map
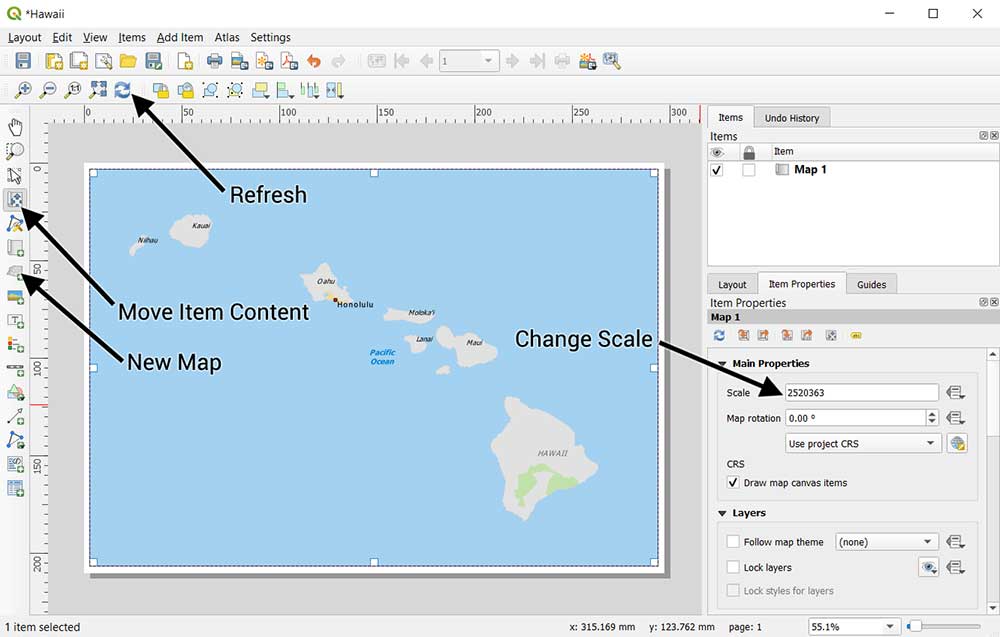
For these steps, see the image below for reference. First, click the Create Map button. Then, create a rectangle to generate a new map. The map in your print layout replicates the one from your main view.
But if you want to add or remove features in your map, make sure you click the Refresh button so those changes are reflected in your print layout.
If you want to pan in any direction, select the Move Item Content button. For zooming in and out, you can use the Scale in the item properties.
Insert a title and north arrow
The map title describes the subject of the map. If you want to add a title click the Add Label button. Next, find a spot on your map and change the text.
If you want to add a North arrow, then click the Add Image button. In the item properties tab, choose the North arrow you want to use in your map.
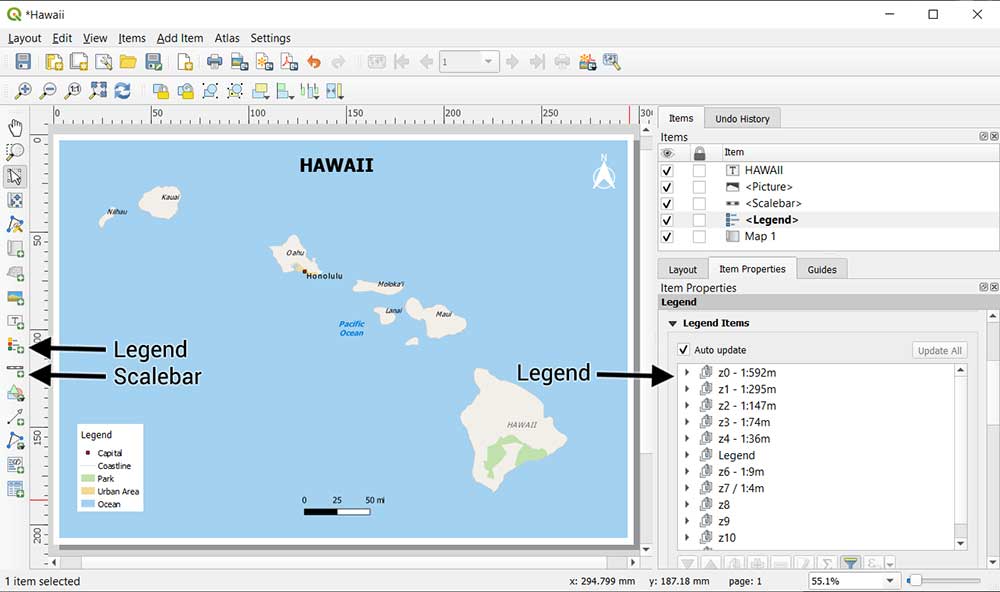
Add a scale bar and legend
Maps always incorporate a representation of scale. Small-scale maps cover more ground such as the size of a country. But large-scale maps have more detail such as a tiny settlement.
The scale refers to the size of the map relative to the size of the ground it represents. If you want to add a scale bar, click the Add Scale Bar button. Next, you can change the unit of distance such as feet, meters, or miles that are proportional to the map.
Finally, click the Add Legend button to insert one in the map. By clicking the filter button on the “Item Properties” tab, it limits the legend to what’s displayed on the map. You’ll notice that the legend item descriptions need a bit of work. Even though it can be tedious, you’ll have to change every legend item to something cleaner.
Do-It-Yourself Mapping in QGIS
The data behind the maps
As you’ve learned, Natural Earth is as reliable as they come. Put it in tandem with QGIS and you’ve got a powerful tag team.
But what if you want more data in your maps? Here are the best sources for GIS, satellite, and elevation data:
- 10 Free GIS Data Sources: Best Global Raster and Vector Datasets
- 15 Free Satellite Imagery Data Sources
- 5 Free Global DEM Data Sources – Digital Elevation Models
Finally, if you want highly detailed data like restaurants, hotels, police stations, churches, beaches, bus stops, and traffic signals, we recommend OpenStreetMap (OSM) data.
OSM is like the Wikipedia of maps. It was created by the largest open community of mappers in the world. Just in New York alone, they’ve digitized close to 2 million infrastructure footprints. But we can promise you this: quality and completeness vary around the world.
Let’s wrap things up
Today, you’ve learned how to make a map using GIS.
You combined Natural Earth data with QGIS 3 to build an unstoppable duo.
But your journey can’t end here because there’s still more to learn.
Check out some of our articles below and explore the unlimited capabilities of QGIS.


So far, it’s interesting